Introduction
After ten years of using zsh as my shell, I’ve recently switched to fish.
I’d been aware of fish for a while, and had even kicked its tires once or twice before, but the impression I’d gotten was that it was super opinionated and “quirky”, and that rubbed me the wrong way. It turns out that’s sort of true, and nowadays I think that’s actually a great thing to be.
I was inspired by these recent blog posts to take another look:
Evans’ post is a good introduction to what makes fish an appealing shell from a longtime user. It covers some of the great functionality that exists outside of the box. Some of it has been ported to zsh, like zsh-users/zsh-syntax-highlighting which adds “Fish shell like syntax highlighting for Zsh” and zsh-users/zsh-autosuggestions which adds “Fish-like autosuggestions for zsh”. Much of my zsh configuration, it turns out, was making zsh work more like fish works out of the box. Hmm!
The announcement post details their ambitious Rust rewrite which was recently completed. The writing in that post is kind of great. It’s funny and clear. There’s compelling storytelling alongside a bunch of technical context. Reading it, I felt like I could happily read changelog updates from these maintainers. It also made me realize that I’ve never read a single piece of writing from the zsh maintainers and don’t even know where I’d go to find it.
Upon a bit of digging, I did find the zsh news page, which has not been updated since May 2022 and the zsh release notes page page which has plenty of detail about each release, but does not feel like it was written for a general audience. Overall the zsh web presence is fairly confusing. There is a zsh.org but it hardly has any information on it. Instead it refers the hapless reader to zsh.sourceforge.io/. Plenty of information exists there, but the whole thing feels to me like it’s covered in cobwebs. Some ambitious web designer looking for a cool project should absolutely volunteer to do some spring cleaning on that site.
Switching
I didn’t think I was in the market for a new shell, but I got such a good vibe from the writing in that announcement post that I decided to try it out.
Actually switching to fish is fairly straightforward on macOS:
- Install the shell
brew install fish
- As of this writing, that Rust rewrite is still in beta, so this will install the 3.x release. Honestly, don’t worry about it. I’ve tried both and can’t tell the difference. If you do want to join me in running the beta you can instead run
brew install fish-shell/fish-beta-4/fish
- Confirm where the fish binary is on the system:
which fish, which prints out /opt/homebrew/bin/fish for me
- Add that binary to the list of allowed shells:
sudo vim /etc/shells and then add /opt/homebrew/bin/fish to the list
- Change the default shell to fish:
chsh -s /opt/homebrew/bin/fish
- Note: no
sudo needed on this one. If you do use sudo, you’ll change the default shell for your sudo user (super user?), not your regular user
- Open a new terminal, and hopefully you’ll see that your shell is now fish. It prints a greeting by default.
- Note: sometimes I need to log out and log back in after changing shells with
chsh, and other times not. I’m not sure why. If the change doesn’t take effect, you can try that.
Next up was porting my zsh shell configuration to fish configuration. I was starting with a few files:
~/.zshrc – 197 lines (my general user configuration)~/.zshenv – 1 line (setting up cargo)~/.zprofile – 1 line (setting up homebrew)
Porting this code meant answering a few questions:
- where does this go?
- how do I rewrite this from the zsh scripting language to the fish scripting language?
Thankfully, fish’s docs are fantastic. Let me count the ways:
- there is a search function
- each page has a table of contents to make it easily navigable
- there are lots of examples
Configuration
I found this doc that answered the question of “where does this configuration go?”: https://fishshell.com/docs/current/index.html#configuration.
Some things I learned about where configuration goes:
- I can put my general user configuration in
~/.config/fish/config.fish
- I can also, optionally, organize my configuration into various files in
~/.config/fish/conf.d/ which fish will also load
- The
~/.config/fish/conf.d files get loaded first, and they get loaded in alphabetical order, so if I want homebrew’s setup to happen earlier (so later configuration scripts can assume that homebrew-installed programs are available to use) I might want to put that in a file like ~/.config/fish/conf.d/0_homebrew.fish.
- In zsh I needed to worry about what was the difference between
~/.zshrc and ~/.zprofile and ~/.zshenv and never quite could remember. Similarly when I used bash and couldn’t remember what was the difference between ~/.bashrc and ~/.bash_profile. With fish I don’t need to worry about this. All of the config files are always laoded. Within those files, I am encouraged to define conditional logic if something only pertains to login shells or interactive shells.
- There is a way to manage configuration in a web UI but you don’t have to use that if you don’t want to
- Instead of putting helper functions into
~/.config/fish/config.fish (which does work) you are encouraged to instead define them in ~/.config/fish/name_of_function.fish. That way, the function doesn’t get loaded until you actually call it the first time, which speeds up your shell initialization. It also means you can add a new function there and it’s immediately available to already-running fish sessions without needing to reload any configuration.
- prompt configuration goes in
~/.config/fish/functions/fish_prompt.fish. To define a prompt you just define that function. A little more on this below.
- Because I’m a very cool minimalist, I can turn off the fish greeting by running
set --universal fish_greeting.
Syntax
And I found this doc that answered the question of “how do I do all the basic programming stuff in fish?”: https://fishshell.com/docs/current/language.html
Some things I learned about the language:
- the syntax feels more modern than zsh or bash. For example, the keyword to end a conditional, loop, function, or block is
end, just like in Ruby. No need to remember if it’s done or fi or esac or }.
- fish has a standard library of commands like path, math, string, and others. Their docs are great. It felt like they’d thought of everything and had elegant, non-hacky solutions to whatever I might need. And I can always access a local version by running, say
help math to pop open the docs
- fish comes with a fish code formatter tool called fish_indent, which you can use to auto-format your fish code. It mostly does indenting, but it seems to do a little bit more than that, too. I enabled it as an ale fixer so it auto-formats on save when I edit fish files in vim. There’s also an ale fish linter which just checks for syntax errors as you go. Both very useful.
- the only way to create variables is with the set command. You can’t just write
foo=bar or FOO=bar or export FOO=bar. This felt weird at first, but I quickly got used to it.
fish_prompt
I’m not a big fan of any of the prompts that fish offers out of the box. Since February 2021, I’ve been happily using pure and I was a little bit loathe to lose it. I decided to configure a fish prompt that looks a lot like pure, but which doesn’t have all of pure’s cool functionality. Here’s what I came up with in ~/.config/fish/functions/fish_prompt.fish:
function fish_prompt
    # Check if the last command succeeded so we can color the prompt red when it
    # did not succeed
    set --local last_status $status

    # Configure fish_git_prompt to show some more info
    set --global __fish_git_prompt_show_informative_status true
    set --global __fish_git_prompt_showdirtystate true
    set --global __fish_git_prompt_showuntrackedfiles true
    set --global __fish_git_prompt_showstashstate true
    set --global __fish_git_prompt_showcolorhints true

    # Configure fish_git_prompt symbols
    set --global __fish_git_prompt_char_stashstate "≡"
    set --global __fish_git_prompt_char_cleanstate ""

    # blank line before each prompt
    echo ""

    # print some info
    string join '' -- \
        (set_color blue) (prompt_pwd --full-length-dirs 2) (set_color normal) \
        (fish_git_prompt)

    # print the actual prompt
    if test "$last_status" -ne 0
        string join '' -- (set_color red) '❯ '
    else
        string join '' -- (set_color magenta) '❯ '
    end
end
This looks a lot like pure, but it doesn’t try to match it 100%. It’s just nice for it to feel a bit familiar.
The main “cool functionality” that pure has, which this doesn’t, is that pure will auto-fetch git repositories for you. I have become somewhat dependent on this. I often hit enter a few times in a git repo just to see if the prompt changes, which might suggest that I need to pull down the latest changes. I considered updating this function to run git fetch when it sees a git repository. Once I started thinking about actually writing that, I felt kind of like that’s actually a crazy thing for a prompt to do, and maybe it’s been crazy that my prompt has been doing that for the last four years. I couldn’t bring myself to do it.
However… I learned that it’s possible to define fish functions which respond to events, and that fish emits an event whenever it is about to call the fish_prompt function. I added this function to ~/.config/fish/conf.d/autofetch.fish:
function autofetch --on-event fish_prompt --description 'Fetch on prompt'
    if test -f ".git/FETCH_HEAD"
        set --local mtime (path mtime --relative .git/FETCH_HEAD)
        set --local duration (math '10 * 60')

        if test "$mtime" -gt "$duration"
            git fetch --prune --prune-tags --quiet
        end
    end
end
This will autofetch, synchronously, if it determines that we haven’t fetched the repo in the last ten minutes. That’s not exactly what pure did, but in practice it’s good enough. I no longer hit enter a few times as a weird way to say “please fetch for me”. Occasionally my prompt hangs for a sec before rendering. Occasionally my prompt indicates that the remote has new commits I might want to pull down. When I’m not connected to the internet, this autofetch fails. It’s not perfect, but I think I overall do like it. And I like that it’s decoupled from the actual rendering of the prompt, so the prompt function can focus on the single responsibility of rendering a useful prompt.
And I love that this kind of thing is even possible and easy in fish to do. Callback functions! What is this, JavaScript?
(Additionally, pure achieves an impressive performance by rendering its git details asynchronously. In theory that’s very cool but in practice it hasn’t felt like an issue for me to have a synchronous prompt.)
Other events
If you want to write some function which runs each time you change directories, that’s also easy to do with events. In fact that’s how tools like fnm implement their functionality to switch node version when changing directories into a project that uses a particular version of node (via):
function _fnm_autoload_hook --on-variable PWD --description 'Change Node version on directory change'
    status --is-command-substitution; and return
    # command that activates the correct version of node
end

_fnm_autoload_hook
This defines a function, tells fish to call it whenever $PWD changes, and then calls the function once, to ensure it runs on shell initialization too.
That’s so elegant. I don’t know if I have a need for doing something like that just yet, but I like knowing I can if I need to.
Universal variables
One gotcha that really confused me was universal variables, a feature I haven’t seen in other shells before.
If you run:
set --universal foo bar
Then the $foo variable is sort of sticky. It exists in every active fish session, including future fish sessions. The value is persisted on disk, and fish references that file on disk to get the value. It’s possible to update the variable (set --universal foo baz) or remove it (set --erase foo). But just be aware, because it can be really confusing if you had a line like set -U foo bar in your ~/.config/fish/config.fish, and then you deleted that line, and the dang variable is still defined???
abbreviations
fish supports aliases just like zsh does. At first I ported over my various aliases and carried on happily. After continuing to poke around the fish docs, I came upon abbr, which manages fish abbreviations.
Previously I had this in my ~/.zshrc:
This is because I wanted to use the very nice sharkdp/bat instead of cat, but my muscle memory continued to keep typing cat anyway.
Now I have:
abbr --add cat bat
The behavior is pretty similar, in the sense that I type cat, and bat runs. The difference is that as soon as I type bat, and then hit space or enter, cat gets replaced with bat in my interactive shell. So I get to see what actually ran, instead of what I originally typed. And that’s what goes into your command history, too. It’s a subtle difference, but I appreciate it.
It’s also possible to define command abbreviations. So, for example, I have a handful of git aliases like git co being an alias for git checkout. Up until now, I’ve defined those aliases in my ~/.gitconfig. But now I’ve migrated all of those to be fish command abbreviations. For example:
abbr --command git co checkout
Now when I type git co, that automatically expands to git checkout.
It’s even possible to create abbreviations that call a function to programmatically determine what the abbreviation should expand into. For example, I have this:
function __fish_t_command
    set --local name (path basename $PWD)
    echo "tmux new-session -A -s $name"
end
abbr --add --function __fish_t_command t
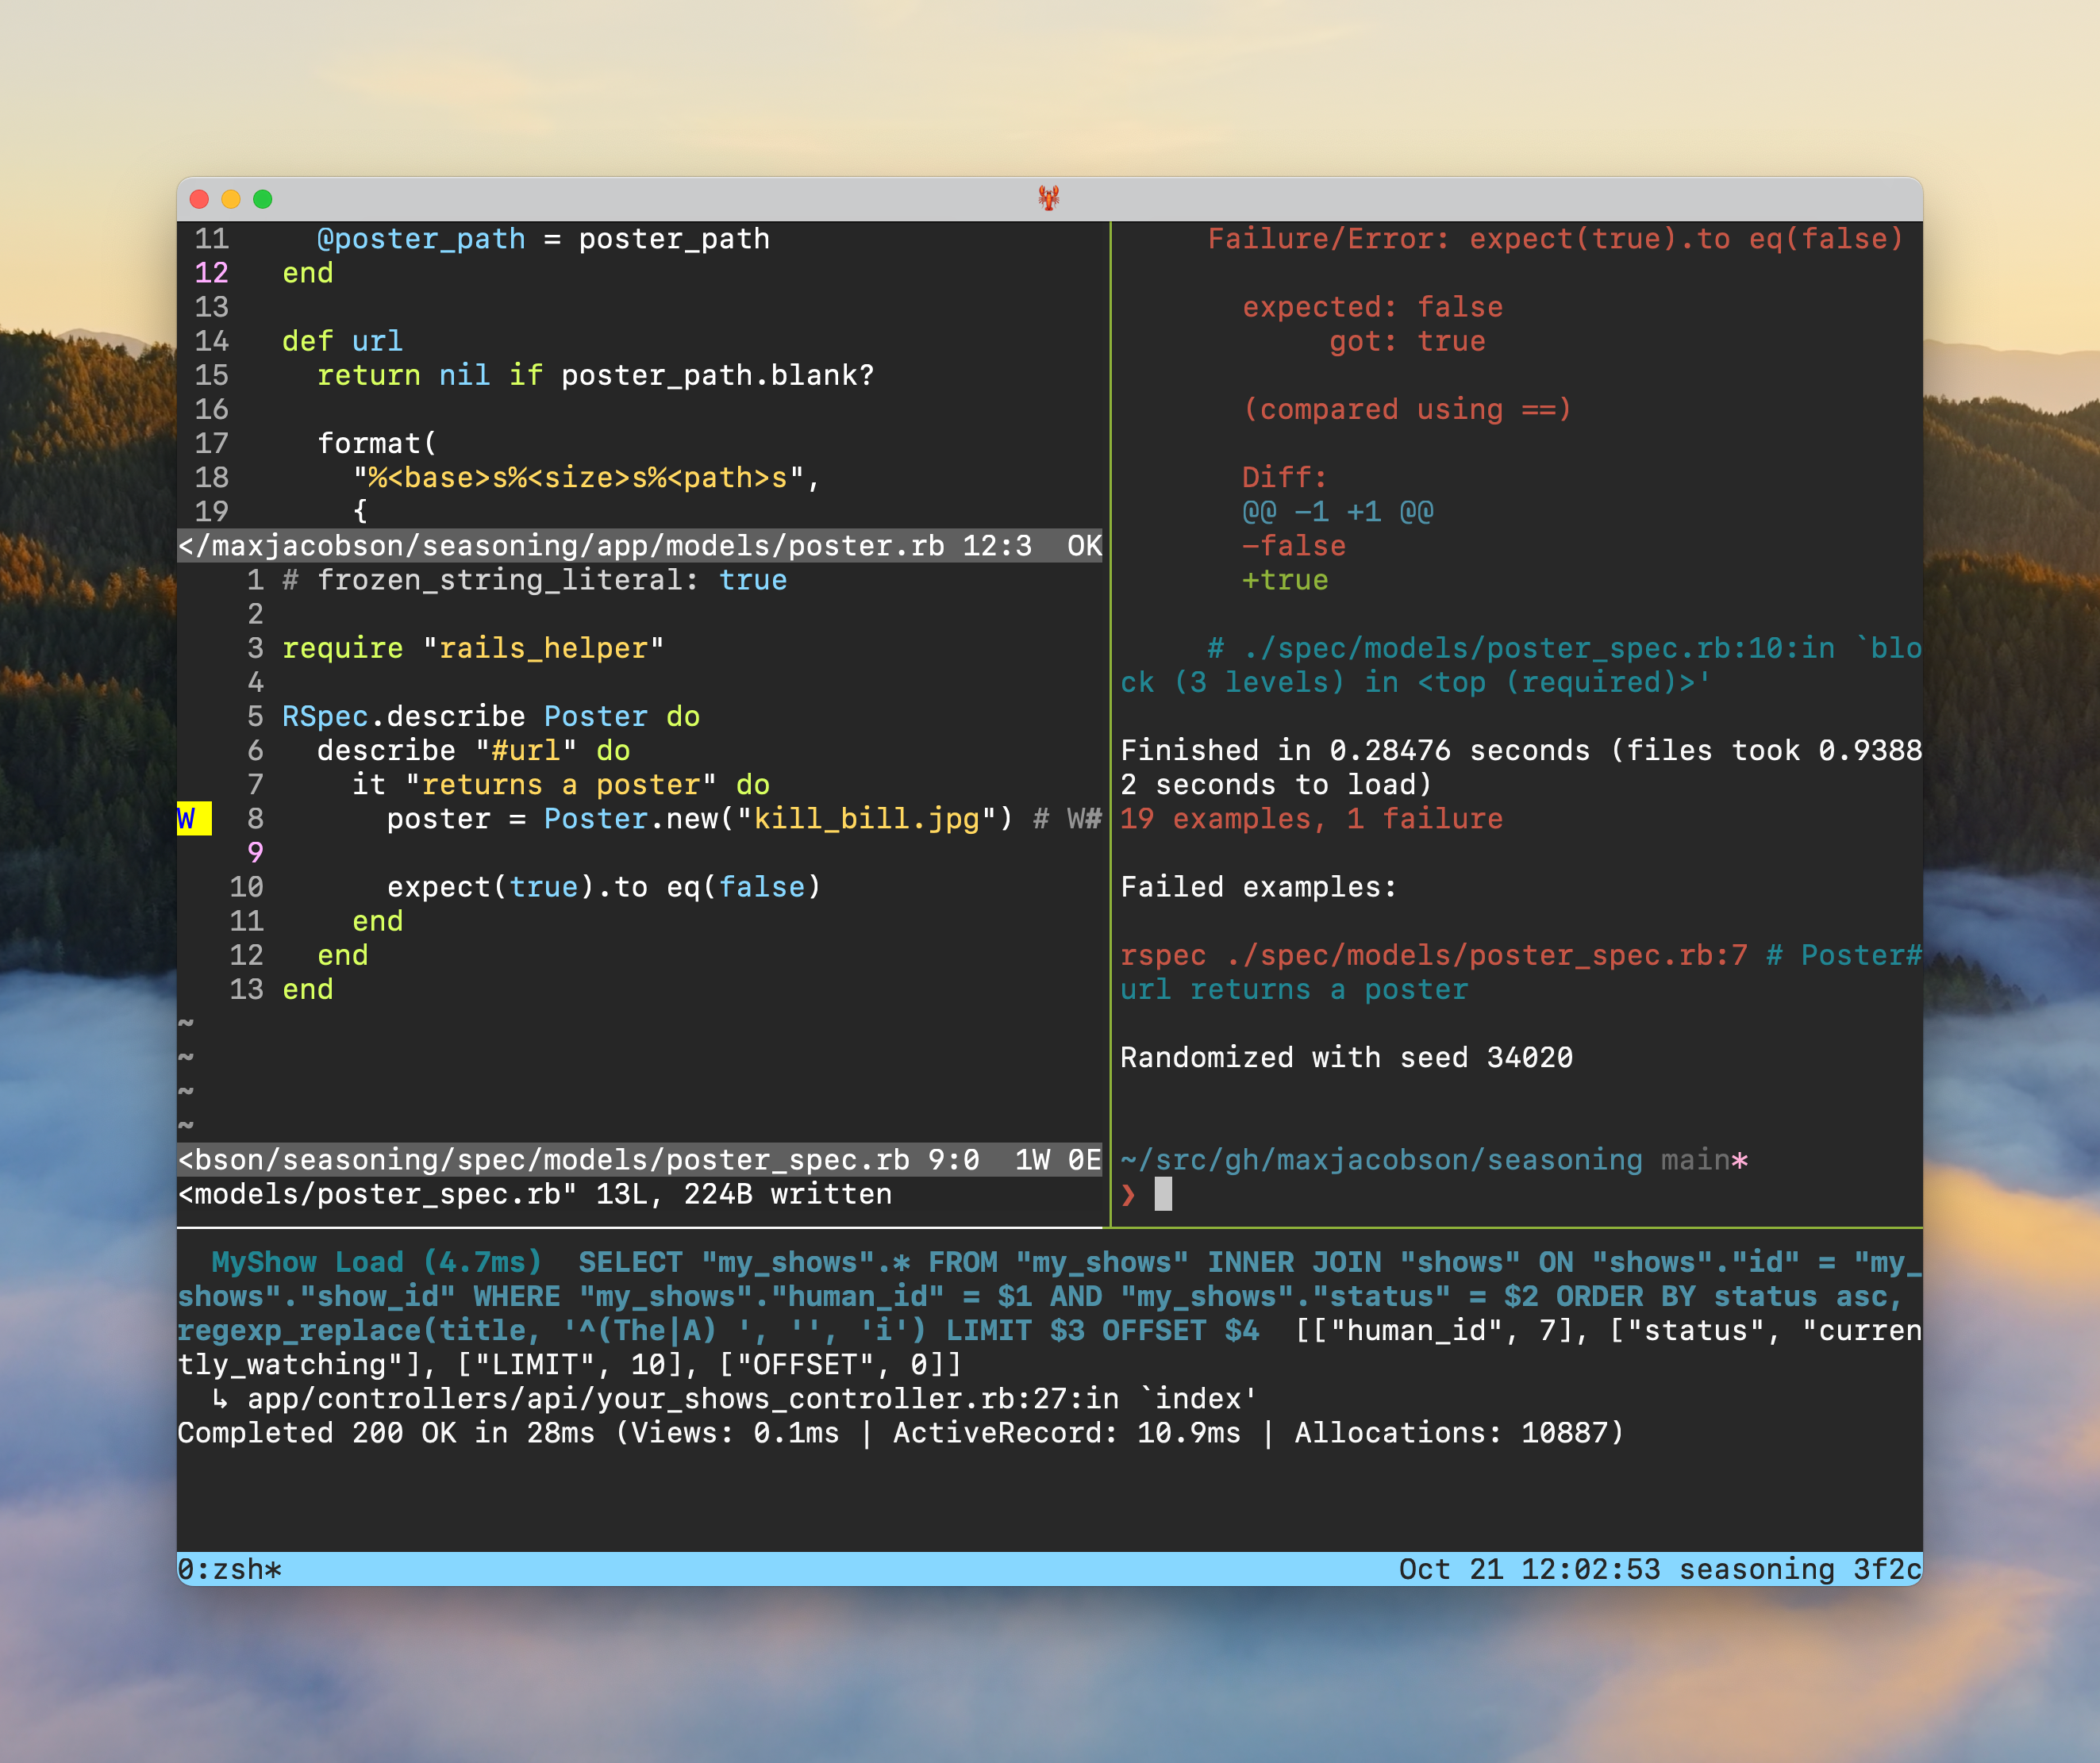
Now when I type t in a project repo, it expands to tmux new-session -A -s seasoning, presuming I’m in a directory called “seasoning”.
(Astute Hardscrabble readers might notice that I’ve given up the over-engineered tmux helpers described in October 2023)
I think this expansion is just better than aliases. Once the command has expanded, tab completion works perfectly, for example.
custom completions
OK speaking of tab completions, one last cool thing before I ship this brain dump of a post.
One of the helper functions I ported from my old zsh configuration was this helper script:
# Clone repos from GitHub.
#
# Usage: clone maxjacobson/film_snob
#
# Inspired by https://github.com/pbrisbin/dotfiles/blob/632ab65643eac277c77c18a2587fec17fd1acac3/zshrc#L19-L28
function clone () {
  case "$1" in
    */*)
      target="$HOME/src/gh/$1"

      if [ -d "$target" ]; then
        echo "already exists"
        cd "$target"
      else
        mkdir -p "$target"
        gh repo clone "$1" "$target"
        cd "$target"
      fi

      ;;
    *)
      echo "Bad input"
      ;;
  esac
}
That became this fish function in ~/.config/fish/functions/clone.fish:
# Clone repos from GitHub.
#
# Usage: clone maxjacobson/film_snob
#
# Inspired by https://github.com/pbrisbin/dotfiles/blob/632ab65643eac277c77c18a2587fec17fd1acac3/zshrc#L19-L28
function clone --description "Clone a repository from GitHub"
    switch "$argv"
        case "*/*"
            set --local target "$HOME/src/gh/$argv"
            if test -d "$target"
                echo "already exists"
                cd "$target"
            else
                mkdir -p "$target"
                gh repo clone "$argv" "$target"
                cd "$target"
            end
        case '*'
            echo "Bad input"
    end
end
Very similar, although there’s definitely less syntactical cruft.
I thought it might be fun to try adding a tab completion to this function that will tab complete the repositories that are available to clone. Everything in fish has great tab completion, but my helper function did not. By default it suggested the files in the current working directory as tab completion candidates, which was annoying.
I learned that it’s possible to configure a command’s tab completions by adding a file in ~/.config/fish/completions/clone.fish
For example you can add this just to tell it not to tab complete filenames:
complete --command clone --no-files
The docs for the complete command have tons of examples. They also encourage you to poke around the completions that come with fish. I found a big trove of them in /opt/homebrew/Cellar/fish/4.0b1/share/fish/completions after checking the directoreis in fish_complete_path. There’s lots of inspiration there.
Ultimately here’s what I came up with:
complete --command clone --no-files

function __fish_clone_repo_pattern
    set --local subpattern "[a-zA-Z0-9\-\_\.]+"
    echo "($subpattern)/?($subpattern)?"
end

# clone foo/<tab>
# clone foo/bar<tab>
# clone foo<tab>
function __fish_clone_should_search
    string match \
        --quiet \
        --regex (__fish_clone_repo_pattern) \
        (commandline --current-token)
end

# look up a particular owner's repos
function __fish_clone_search_results
    set --local groups (
      string match \
          --groups-only \
          --regex (__fish_clone_repo_pattern) \
          (commandline --current-token)
    )
    gh search repos \
        --owner="$groups[1]" \
        --json fullName \
        --jq '.[].fullName' \
        "$groups[2]"
end

# clone foo/<tab>
# will search GitHub for foo's repos and offer them as tab completions
complete \
    --command clone \
    --condition __fish_clone_should_search \
    --arguments '(__fish_clone_search_results)'
There’s a lot going on there, but the upshot is that when I type clone maxjacobson<tab>, fish will ask GitHub what repos are owned by maxjacobson and offer them as tab-completion suggestions.And if I type rails/action<tab>, it tab completes just the repos owned by rails that have action in the name.
Programming in fish is fun. I know it’s possible to do this kind of thing in zsh too, but I never would have attempted it.
Conclusion
I have been having a lot of fun with fish! Perhaps more posts to come as I continue poking at things.
]]>