Hardscrabble 🍫

By Max Jacobson

See also: the archives and an RSS feed

whoa, ruby's alias is weirder than I realized

June 23, 2014

Just saw some ruby code using the alias method, and did a quick and routine google to find some examples of how it works, especially as compared to the alias_method method.

This blog post and some others recommend to use alias_method over alias and I’m going to agree, but for different reason: calling alias looks weird to me.

This looks perfectly normal to me:

class Whatever
  def whatever
    "whatever"
  end

  alias_method :something, :whatever
end

Whatever.new.whatever #=> "whatever"
Whatever.new.something #=> "whatever"

alias_method is a method that takes two arguments and they’re separated by commas. Under the hood I don’t know what it’s doing but that’s never stopped me from calling a method, and I know how to call a method.

This looks goofy to me:

class Whatever
  def whatever
    "whatever"
  end
  alias :something :whatever
end
Whatever.new.whatever #=> "whatever"
Whatever.new.something #=> "whatever"

What even is that? It looks like we’re calling a method, but the arguments aren’t comma-separated… it feels weird.

I guess this probably isn’t a great reason to prefer one programming technique over another, but for me it’s harder to understand and therefore remember, and what I really like about Ruby is that it’s simple – almost everything is an object or a method, which follow some set of learnable rules.

alias_method is a method; alias is a keyword, like def or class and it can be even syntactically weirder:

class LowfatKefir
  def probiotic?
    true
  end
  alias tasty? probiotic?
end
LowfatKefir.new.tasty? #=> true

Not only do you not need to comma-separate the “arguments” to alias, but they don’t have to be symbols either which feels like another violation of my understanding of how this language works, which is that we use symbols when we want to reference methods without invoking them, because referencing the method always invokes it.

selecta

May 5, 2014

One of my favorite things about my vim setup is the way I open files. For a little while I used ctrlp and then I switched to Gary Bernhardt’s selecta script.

selecta is cool in part because of how it’s designed to be more than a vim plugin, although that’s mainly what I use it for. The readme gives a few examples of how else it could be used and other people come up with weirder stuff.

Also cool is the means of distribution. Recently someone added it as a homebrew formula, making it easy to install and keep it up-to-date on a Mac, but until then, the recommended move was to download a raw ruby script, make it executable, and put it on your PATH, and then I guess hope to remember to update it occasionally. If you want to use it in vim, you can copy and paste a vimscript function from the readme into your vimrc.

Here’s the code from the readme:

" Run a given vim command on the results of fuzzy selecting from a given shell
" command. See usage below.
function! SelectaCommand(choice_command, selecta_args, vim_command)
  try
    silent let selection = system(a:choice_command . " | selecta " . a:selecta_args)
  catch /Vim:Interrupt/
    " Swallow the ^C so that the redraw below happens; otherwise there will be
    " leftovers from selecta on the screen
    redraw!
    return
  endtry
  redraw!
  exec a:vim_command . " " . selection
endfunction

" Find all files in all non-dot directories starting in the working directory.
" Fuzzy select one of those. Open the selected file with :e.
nnoremap <leader>f :call SelectaCommand("find * -type f", "", ":e")<cr>

I made one change, which was to use ctrl+p instead of leader+f, because I’d trained my fingers on ctrl+p and didn’t have the reserves of peace & discipline to consider changing. Other than that I left it as-is, until today.

I wanted to edit my .gitignore file, and noticed that it wasn’t opening. Not a big deal, I wrote :e .gitignore and survived.

The comment says it opens all files in all non-dot directories. It’s kind of true but not exactly, as it ignores dotfiles regardless of their location. I definitely want it to ignore files in dot directories (.git and .sass-cache come to mind), but I don’t want it to ignore most dotfiles.

selecta works like this: you pipe some list of information into it, it breaks it apart, lets you select one line from the list, and then pipes that selection out to the next command. This vim plugin runs the bash command find * -type f, which prints the list of non-dot files (-type f excludes directories, * excludes dots) and then pipes it to the vim edit command :e.

Since setting this up months ago I’ve learned and used the find command a few times but had no idea it was powering my fuzzy opener thing! Something opaque opened up a little. So I edited that last part like this:

" Find all files and all non-dot directories
" starting in the working directory
" and edit the chosen thing
nnoremap <c-p> :call SelectaCommand("find . -not -path './.*/*'", "", ":e")<cr>

The main changes:

  • dotfiles now show up, so I have easier access to files like .gitignore and .travis.yml
  • directories now show up, so I can jump directly to specific directories in netrw
  • now there’s a leading ./ in the list of options because find * and find . have a different output?

I made a before and after gif.

I think I like this! But actually what if it sorted the files by last modified date?

refactoring very old code

April 13, 2014

Before I went to Flatiron School last summer I cobbled together a web app called Layabout. This weekend, for the first time in a very long time, I worked up the nerve to look at the source code. You may have heard the phrase “code smell” but I’m not sure it applies to this code. This code is like that ominous stink you’d almost rather ignore?

Hmm.

Layabout is an Instapaper client that focuses on the videos you’ve bookmarked. I was the only one who ever used it. I stopped using it in part beause it was buggy, and in part because I wanted to try out Pocket for a little while, which ended up being most of a year.

Inspired by John Resig’s recent blog post “Write Code Every Day” encouraging employed programmers to maintain side projects in a sustainable, I decided to revisit Layabout and see if anything I’ve learned in the year since I last edited it would come in handy. I also enjoy laughing at myself from the past.

The app had been running on Heroku unused for a year. When I logged in1 and tried to watch a video, it immediately crashed. I found the codebase locally and ran heroku logs to try to get some more information about the crash but it simply said it was a 500 error. Hmm.

So I tried running the app locally2 and was surprised to find that it worked even worse than it did on Heroku! Online at least I could type my password in before it crashed, but locally no pages were rendering at all. Instead it was complaining about not being able to find the views. I googled the error message and learned that some versions of Sinatra require you to explicitly tell it where your views are. I had never had this error before, but I was having it now. I looked at my Gemfile and saw that in my list of dependencies, I didn’t specify my desired version number for any of them. Code smell! You gotta lock that down, because things can change and break, especially when you don’t edit your code for over a year.3

After resolving that error I was able to reproduce the crash and see a much more verbose error message. You know how some YouTube videos have embedding disabled? I’m using a library, ruby-oembed, to fetch embed codes from video URLs, and it raises an exception when the video has embedding disabled. I used to think that meant my thing needed to crash but I’ve since learned about exception handling. Here’s a before:

def get_embed (vid_site, id)
  if vid_site == :youtube
    url = "http://www.youtube.com/watch?v=#{id}"
    return OEmbed::Providers::Youtube.get(url).html
  elsif vid_site == :vimeo
    url = "http://www.vimeo.com/#{id}"
    return OEmbed::Providers::Vimeo.get(url, maxwidth: "500", portrait: false, byline: false, title: false).html
  elsif vid_site == :hulu
    url = "http://www.hulu.com/watch/#{id}"
    return OEmbed::Providers::Hulu.get(url).html
  else
    return "<p>Failed to get embed code</p>"
  end
end

And after:

def get_embed (vid_site, id)
  begin
    case vid_site
    when :youtube
      OEmbed::Providers::Youtube.get("http://www.youtube.com/watch?v=#{id}").html
    when :vimeo
      OEmbed::Providers::Vimeo.get("http://www.vimeo.com/#{id}", maxwidth: "500", portrait: false, byline: false, title: false).html
    when :hulu
      OEmbed::Providers::Hulu.get("http://www.hulu.com/watch/#{id}").html
    else
      "Unsupported site"
    end
  rescue Exception => e
    puts e.inspect
    "<p>Sorry, couldn't get the embed code for this one. Maybe it doesn't allow embedding? Or maybe it was deleted? Sorry.</p>"
  end
end

(I guess I didn’t know about case statements or implicit return values then either.)

It’s still not that great honestly. I wish it were more object oriented. I wish there were tests. I wish I could open source it without exposing my Instapaper API keys. I know it’s possible to scrub your history and I’m going to look into that, and then keep them in a separate file ignored by git; or maybe I’ll look into getting new keys. But I’m glad to be revisiting this project because it’s where I got excited about web development. One last before and after:

Layabout needs to ignore bookmarks that it doesn’t know how to embed. It also needs clean URLs to reliably lookup their embed codes. Here’s an old method which helped with this task:


def grok_url (url)
  # TODO support hulu short urls
  if url =~ /youtube\.com\/embed\//
    id = url.match(/\/embed\/([A-Za-z0-9_-]+)/)[1].to_s
    site = :youtube
  elsif url =~ /youtube\.com/
    id = url.match(/v=([A-Za-z0-9_-]+)/)[1].to_s
    site = :youtube
  elsif url =~ /youtu\.be/
    id = url.match(/(http:\/\/youtu.be\/)([A-Za-z0-9\-_]+)/)[2].to_s
    site = :youtube
  elsif url =~ /vimeo\.com\/m\//
    id = url.match(/\/m\/(\d+)/)[1].to_s
    site = :vimeo
  elsif url =~ /vimeo\.com/
    id = url.match(/vimeo\.com\/([\d]+)/)[1].to_s
    site = :vimeo
  elsif url =~ /hulu\.com\/watch/
    id = url.match(/watch\/([\d]+)/)[1].to_s
    site = :hulu
  else
    return false, false, false
  end
  return true, site, id
end

I used it like this:

video_links = Array.new
if folder_id == :readlater
  all_links = ip.bookmarks_list(:limit => 500)
else
  all_links = ip.bookmarks_list(:limit => 500, :folder_id => folder_id)
end
all_links.each do |link|
  if link["type"] == "bookmark" # filters out the first two irrelevant items
    is_video, vid_site, video_id = grok_url link["url"]
    if is_video == true
      link["video_id"] = video_id
      link["title"] = cleanup_title link["title"] # prob not necessary
      link["vid_site"] = vid_site
      link["description"] = make_clicky link["description"]
      video_links.push link
    end
  end
end
@videos = video_links

Honestly I think this is cool code even though it’s not how I’d write it now, because this is what it looks like to make it work with limited knowledge. I didn’t know about any fancy iterators. I legit didn’t know about object oriented programming. I didn’t know it’s not necessary to check if a boolean == true, but it wasn’t hurting anyone! Whenever I’m talking to beginners and see code that doesn’t take advantage of less-than-obvious techniques, but works, I’m psyched.

Anyway this is what I changed it to yesterday:

@videos = (if folder_id == :readlater
  ip.bookmarks_list(:limit => 500)
else
  ip.bookmarks_list(:limit => 500, :folder_id => folder_id)
end).map do |link|
  if link['type'] == 'bookmark' # filters out the first two irrelevant items
    snob = FilmSnob.new(link['url'])
    if snob.watchable?
      link.tap do |link|
        link['video_id'] = snob.id
        link['title'] = cleanup_title link['title']
        link['vid_site'] = snob.site
        link['description'] = make_clicky link['description']
      end
    end
  end
end.compact

I don’t even necessarily think that’s better, but it satisfies my learned allergy to local variables4 and makes me feel cool for using map and tap.

Ah, and what’s FilmSnob? Let’s revisit Resig’s blog post:

I decided to set a couple rules for myself:

  1. I must write code every day. I can write docs, or blog posts, or other things but it must be in addition to the code that I write.
  2. It must be useful code. No tweaking indentation, no code re-formatting, and if at all possible no refactoring. (All these things are permitted, but not as the exclusive work of the day.)
  3. All code must be written before midnight.
  4. The code must be Open Source and up on Github.

Because Layabout isn’t currently open-sourceable, I extracted part of it into a rubygem called film_snob. It’s basically just that grok_url method, but made object-oriented, tested, and designed to be more extensible in case I ever want to support more than three video sites. I hope to also extract the embedcode fetching from Layabout into film_snob, but without the ruby-oembed dependency.


update I did implement the oembed stuff!! Yeah!!

  1. By giving my Instapaper credentials directly to the app, which I now know is kind of a no-no in the age of Oauth (though I’ve given my Instapaper credentials directly to some other apps like Reeder and Tweetbot so idk. Definitely a smell. 

  2. Which was totally possible because all of the API keys were hardcoded into the app. Smell! 

  3. What’s weird to me is that the version number seems to have regressed? The assumption that views are in a folder called views was introduced in 1.1, and I seem to have been taking advantage of that, but then it forgets to assume that? I don’t know. Versions are hard. 

  4. except the snob variable which I’m not sure how to avoid; suggestions welcome!! 

Atom Editor

April 13, 2014

I tried out Atom Editor, the new text editor from GitHub.

I’m excited that GitHub is the kind of company that makes a new text editor. GitHub plays such a big part in my life as a programmer that it’s easy to forget that they’re basically irrelevant to almost all my friends and family. But maybe they won’t be forever.

Atom looks and feels uncannily like Sublime Text. I saw some speculation that GitHub had acquired Sublime Text and I kind of hope that’s true, although there’s been no confirmation or real indication that this is the case. It’s very flagrant. But, there are several ways in which it’s much better:

  • It comes with a simple, native package manager
    • textmate does too, I think, but it’s SO CONFUSING I’ve been trying to figure out how it works for years
    • sublime requires a third party thing which is confusing to install, but otherwise awesome
    • vim also requires a third party thing which is kind of confusing to install, but then, it’s vim, and everything is confusing
  • it reliably auto-installs its command line utility for launching the editor without needing to do any fancy symlinking business unlike Sublime
  • it’s written mostly in CoffeeScript and has many open source components to look at and maybe learn from
  • has some (but less than I expected) native integration with Git and GitHub, for example:
    • in the footer it will tell you how many lines were added and removed in this file since the last commit
    • has a native package to open the current file on GitHub

For the above reasons, this is probably the text editor that I’ll recommend to people who are new to programming.


I wrote the above when I first got the beta a few weeks ago and expected to elaborate before posting. I haven’t used Atom very much since thenor even heard much about it. I went to a vim meetup and an emacs meetup last week. I use vim but I’m curious to learn what emacs is all about. One of the speakers at the vim meetup said he uses and practices vim because it makes him more productive. I don’t know if I buy that – I’ve seen people be amazingly productive with a bunch of tools. But I think it makes it more fun and enjoyable, which I guess can lead to productivity. I’m reminded of a meme you hear in the writing community: writing about writing isn’t the point, writing is.

shebangs and bins

January 19, 2014

I had a thought the other night as I was falling asleep: I guess I could create my own shebang? I asked Siri to remind me later and fell asleep.

OK what’s a shebang? I’m going to try to explain my understanding of it step by step, forgive me if this is obvious or boring.

So let’s say you write a ruby program that looks like this:

# hello.rb
puts "hello world"

And you run it from the command line by writing ruby hello.rb and hitting enter.

Or maybe write basically the same thing in python like this:

# hello.py
print "hello world"

And run it from the command line by writing python hello.py and hitting enter.

And the same thing in CoffeeScript

# hello.coffee
console.log "hello world"

And run it by writing coffee hello.coffee and hitting enter.

Three different files are interpreted as three different programming languages by three different intrepreters. We indicate which language it is written in and should be interpreted as in two ways in those examples:

  1. which command we invoked (ruby, python, and coffee)
  2. the file extension (rb, py, coffee)

The file extension isn’t really necessary. See:

# hello.sandwich
puts "hello world"

? This file can be run with ruby hello.sandwich and it works totally fine. Probably continue to use conventional file extensions because they signal to your text editors and friends what type of file they are. But I think it’s kind of helpful to know that they’re not totally necessary or magical.

OK so what if you want to call this program without specifying the interpreter every single time? This is where shebangs come in:

#!/usr/bin/env ruby
# hello.sandwich
puts "hello world"

Now this is a file with a nonsense file extension but something new: the first line (the shebang) indicates which program is meant to interpret this file. Interestingly, it’s not a direct path to that binary file on your file system (which in the case of Ruby programmers who use rvm to switch between Ruby versions, is often changing – mine is currently at /Users/maxjacobson/.rvm/rubies/ruby-2.1.0-p0/bin/ruby but only because I’m checking out the newly released Ruby 2.1.0), but instead consults your environment and says “hey, I’m looking for something called ruby, who wants to handle this one?”

How do you call this file if you don’t specify the interpreter? Basically you just provide a path to the file, like this: ./hello.sandwich. You’ll probably get this error: bash: ./hello.sandwich: Permission denied. I’m sure there are very good security reasons for this but it’s kind of annoying honestly. You need to run chmod +x hello.sandwich which transforms the script from a generic text file to an “executable” file. If you do that, now you can run ./hello.sandwich and your program will run thru the ruby interpreter.

What is the ./ part? It’s kind of ugly, and it’s the next thing we want to get rid of. It’s a path to the file. The same way you might run cd .. to change directories up a directory, you can run cd . to remain in your current directory. I know programming has irrevocably ruined my sense of humor because I now find it funny that you can run cd ././././././. to remain where you are. So ./hello.sancwich is a path to a file in the current directory.

Let’s actually rename the file to have no file extension (mv hello.sandwich sandwich) and run it again ./sandwich. Still works. It’s totally possible to run this file without the ./, but we need to put it somewhere special. We need to put it on our $PATH, which is a list of all of the places on your computer you keep these executable files. To see your $PATH you can run echo $PATH and you’ll see them spat out all colon separated. You can move your file to one of those directories or create a new directory, probably located at ~/bin or ~/Dropbox/bin (via), and add it to your $PATH.

$PATH is a global variable in your command line environment and it can be edited like this: export PATH="whatever" but probably don’t do that because it will totally overwrite the variable in your current terminal session and you won’t have access to any of the executables you depend on and you won’t be able to do anything. The common way to append a directory to your $PATH is like this: export PATH=~/bin:$PATH, which sets the variable to ~/bin, a colon, and then everything that used to be in the variable. Perfect. If you want this directory to always be accessible, not just in the current terminal session, you should add that line of code to your ~/.bashrc or ~/.bash_profile file1 and it will be included in every new terminal session.

So, if your sandwich file is in a directory that’s on your $PATH, and it has the shebang that specifies its interpreter, you can now run simply sandwich from anywhere on your computer and it will call that program. It’s kind of amazing how it does it, right? You write the word sandwich, hit enter, and it looks thru a list of directories for a file with that name; when it finds one, it checks its permissions, then looks at the first line to figure out how to interpret the file; that line points to an environment-checking program and passes in the argument “ruby”2, which finds the correct ruby interpreter, and then calls it, evaluating the remainder of the program.

OK so that’s awesome. But what if I want to write this program:

#!/usr/bin/env sandwich
# grilled_cheese
make_sandwich(
  ingredients: [
    "rye",
    "american cheese",
    "some sprinkles of gorgonzola",
    "maybe some sweet chili sauce",
    "butter"
    ],
  directions: [
    "get ingredients",
    "assemble a sandwich",
    "melt a little butter in a pan",
    "put the sandwich in the pan",
    "apply some downward pressure",
    "flip",
    "apply some downward pressure",
    "enjoy"
  ]
)

OK so I put “sandwich” in my shebang instead of a real programming language. What. Haha.

Let’s make the grilled_cheese file executable and put it in our bin, and then run grilled_cheese. We want to confirm that it’s looking up and finding the sandwich program and running it. When we see “hello world” again, we know it is. But it’s not making a sandwich! But then, how can it? Our code isn’t even being evaluated; if it were, we would probably have an error because the make_sandwich method is not availabe in the Ruby Standard Library (unfortunately).

Let’s edit our sandwich program to get a sense of what it knows about our grilled cheese program.

#!/usr/bin/env ruby
# sandwich
puts ARGV.inspect

Now when I run grilled_cheese, instead of seeing “hello world” I see ["/Users/maxjacobson/bin/grilled_cheese"]. Ahaa! Just because we invoke the sandwich program from the grilled cheese program doesn’t mean we will automatically evaluate the grilled cheese code. We just pass the filename as an argument, much like when we run ruby hello.rb. It’s a lot like if we ran sandwich grilled_cheese.

OK so knowing that, maybe our sandwich file should look something like this:

#!/usr/bin/env ruby
# sandwich

def make_sandwich(options)
  options[:ingredients].each do |ingredient|
    print "Finding #{ingredient}..."
    sleep 1
    print " done!\n"
  end
  options[:directions].each do |step|
    print "Doing #{step}..."
    sleep 1
    print " done!\n"
  end
end

eval File.read(ARGV.first)

So, this defines our missing method, takes in the file as an argument, reads the file as a string, and then evaluates the file with eval. OK so the only thing I know about eval is that you probably should never use it because it’s dangerous af. But maybe this is the kind of context where it makes sense?


I’m sure there are actually practical reasons to use custom-written programs in the shebangs of other custom-written programs and if you think of any please let me know.
  1. Unfortunately still don’t have a really solid understanding of the difference between those. 

  2. env is available to use from the command line as well: try running env ruby -v 

updating a jekyll/github blog from the iPad, or anywhere, without touching git

January 12, 2014

UPDATE April 2015: Here’s a much, much better way to do it: How to easily post to your Jekyll blog from your iPhone or iPad

First of all: if anyone subscribes to my RSS feed, I apologize for flooding it today with test posts as I futzed with this.

Today I wrote my first Editorial workflow and also my first Python script. Fun day!

Editorial is a power user text editor for the iPad. Before today I never really used it but I think I’ll use it more now.

This project was inspired by a recent episode of the tech podcast Core Intuition. They were discussing blogging software. One of the hosts, Daniel Jalkutt, makes the Mac blogging app MarsEdit, and they’ve both been around long enough to have really interesting thoughts on the space. MarsEdit allows bloggers to post to most of the major blog systems but not static blogs like Jekyll (what I use for this blog), Pelican, Octopress (which is built on Jekyll), Roots, or any number of other, similar projects.

Which is understandable because those don’t really expose an API for it to integrate with. But what if they did? (haha)

I’m going to step away from discussing the broader context of static blog tools and focus specifically on Jekyll blogs deployed to GitHub pages, which is the bulk of my experience.

Here’s how I generally write and publish posts, before today:

  • clone or pull the git repo
  • use poole to run poole draft "Title Of Post", which reates a new markdown file for me
  • use vim to write the post
  • serve the blog locally to make sure it looks right
  • when I’m done, run poole publish _drafts/title_of_post.md, which moves the file into the _posts directly and inserts the current time into the configuration at the top
  • use git to commit and push the post up to GitHub, which will re-compile the site using jekyll build

I can do this easily on the computer and it’s pretty nice. I can do this on the iPad using Prompt to SSH into a DigitalOcean server and it’s okay. I can do the same on my iPod Touch and it’s kind of awkward and overly small.

There are a few major advantages to having a static blog. To me, the main boon is the lack of a database. It’s definitely an advantage that there’s no server-side computation going on – the HTML is available to serve immediately after being requested – but maybe it’s a disadvantage that there’s no server-side API. In theory, a static blog API could do several things:

  • create posts
  • update posts
  • delete posts
  • render posts as JSON

What I’ve created today only does the first thing. It’s pretty simple. It would need to do all of those, and probably much more I’m not currently imagining, to integrate with something like MarsEdit. But it’s enough to do something pretty cool: now I can write posts in Editorial on my iPad (I’m writing this one that way) which has a browser built-in for research and an embarrassment of possibilities for extensibility because it’s somehow snuck the Python scripting language into Apple’s walled garden.

Here’s a demo video (sorry it’s so long):

Here’s the source of the Rails project that serves as a Jekyll API: maxjacobson/jekyll_api. Here’s the Editorial workflow which will currently only work for me, because I’m not sure the best way to share the source for something like this that’s not just a script, but a chain of macros and scripts.

Actually, here’s the most-relevant chunk of the workflow, my first python script, somewhat out of context:

#coding: utf-8
import workflow, requests

script_params = workflow.get_parameters()

auth_token = script_params["auth_token"]
blog_id = script_params["blog_id"]

post_slug = workflow.get_variable("slug")
post_text = workflow.get_variable("text")

params = {
  'auth_token': auth_token,
  'post[slug]': post_slug,
  'post[text]': post_text
}

response = requests.post("http://pairwith.maxjacobson.net:3000/blogs/" + blog_id + "/publish", params=params)

if response.status_code == 200:
  workflow.set_output("Successfully posted")
else:
  workflow.set_output("Something went wrong")

As I mention in the video, in theory I can deploy this app to an actual production environment (note the weird URL if you like) and allow other people to use it. I probably won’t.

Alright now I’m going to press “Post”. I’m kind of nervous! Wish me lu

Didn't Ricky Gervais get in trouble for saying that? On MongoDB

January 11, 2014

Remember when Ricky Gervais got in trouble for using the word “Mong” a lot to mean “stupid” and a lot of people were mad at him because it’s an offensive thing to say? Anyway, I’ve been using MongoDB and Mongoid at work and I sometimes worry that the very name is kind of rude, but other than that I mostly like it.

My only database experience prior to this was with personal / school projects exclusively using SQLite3 and mostly with ActiveRecord as the interface to that database. Not coincidentally, this is the default Rails stack.

I want to make a simple rails project, a To Do List app becase duh, twice, once with ActiveRecord and once with Mongoid, and just see what kind of observations I have. OK I’m going to do that now. I’m going to use Rails 4.0.2.

First, with ActiveRecord

Getting started by running these commands:

  • gem install rails – install the latest version of the Ruby on Rails gem
  • rails new todo_list – create a new rails project called “todo_list”
  • cd todo_list – change directories into that new project’s folder
  • bin/rails generate model category name:string
  • bin/rails generate model task name:string complete:boolean category_id:integer
  • bin/rake db:migrate – to create a database “db/development.sqlite3” and update its schema. We’ll come back to this when we talk about Mongoid because it’s way different.

Then editing my freshly generated models to look like so:

# app/models/task.rb
class Task < ActiveRecord::Base
  belongs_to :category
end

and

# app/models/category.rb
class Category < ActiveRecord::Base
  has_many :tasks
end

That should be enough that we can now run bin/rails console and create some data:

# we're in the rails console now
c = Category.new #=> #<Category id: nil, name: nil, created_at: nil, updated_at: nil>
c.name = "Things to buy" #=> "Things to buy"
c.save #=> true
c #=> #<Category id: 1, name: "Things to buy", created_at: "2014-01-11 22:10:47", updated_at: "2014-01-11 22:10:47">
c.tasks #=> #<ActiveRecord::Associations::CollectionProxy []>
c.tasks.build(name: "Buy some spinach") #=> #<Task id: nil, name: "Buy some spinach", complete: nil, category_id: 1, created_at: nil, updated_at: nil>
Task.count #=> 0
c.save #=> true
Task.count #=> 1
c.tasks #=> #<ActiveRecord::Associations::CollectionProxy [#<Task id: 1, name: "Buy some spinach", complete: nil, category_id: 1, created_at: "2014-01-11 22:22:24", updated_at: "2014-01-11 22:22:24">]>
Task.all.class #=> ActiveRecord::Relation::ActiveRecord_Relation_Task

So that whole way works fine. It’s nice.

Again, with Mongoid

The Mongoid Installation page is kind of intimidating:

There are a few things you need to have in your toolbox before tackling a web application using Mongoid.

  • A good to advanced knowledge of Ruby.
  • Have good knowledge of your web framework if using one.
  • A thorough understanding of MongoDB.

This may seem like a “thank you Captain Obvious” moment, however if you believe that you can just hop over to Mongoid because you read a blog post on how cool Ruby and MongoDB were, you are in for a world of pain.

Mongoid leverages many aspects of the Ruby programming language that are not for beginner use, and sending the core team into a frenzy tracking down a bug for a common Ruby mistake is a waste of our time, and all of the other users of the framework as well.

When I started using MongoDB I was kind of freaked because it promised to be so different. But honestly it’s not that different. In a SQL database you need to write your queries using SQL, right? That stuff is so hard to write and inscrutable to read, at least for this blogger. MongoDB queries are written in JavaScript. That’s a major upgrade in my book, even if it were otherwise the same underlying technology. And then, if you’re using Mongoid, you can make another great upgrade by writing your queries in Ruby.

Of the three prerequisite bullet points listed on that page, I think I only disagree with the third one. If you’re completely unfamiliar with MongoDB but fairly familiar with Rails, Ruby, and ActiveRecord I think you can make the leap. That’s what I did. I started out by using Mongoid as if it were ActiveRecord, which is mostly totally possible. Then you can keep exploring the docs and branch out if you want.

One setup prerequisite is that you have MongoDB installed on your system. I think I have it on my laptop. I actually have no idea if I have it. Let’s find out.

Getting started by running these commands:

  • gem install rails – install the latest version of the Ruby on Rails gem
  • rails new todo_list --skip-active-record – create a new rails project called “todo_list” without ActiveRecord1
  • cd todo_list – change directories into that new project’s folder

Now, before I generate my models I need to indicate that this project is going to use Mongoid. To do this I’m going to add the following to my Gemfile:

# Use MongoDB as the database
gem "mongoid", "4.0.0.alpha2"

I’m using the alpha version of Mongoid 4 because… well, I’m sticking with the basics, so why not?

Now let’s continue with these commands:

  • bundle install – fetch the Mongoid code from RubyGems for our project
  • bin/rails generate mongoid:config – create a configuration file; this generator didn’t exist a moment ago, I think that’s cool
  • bin/rails generate model category name:string --timestamps – create the category model; almost exactly the same command as before, but using a new Mongoid generator, which doesn’t include created and updated timestamps by default
  • bin/rails generate model task name:string complete:boolean --timestamps – create the task model

This is the step in the ActiveRecord version where we ran bin/rake db:migrate. We don’t have to do that now. No migration files have been created. The database is flexible. How does that make you feel? If that sounds totally awesome, MongoDB might be for you. If that freaks you out, probably not.

Let’s take a look at the model files that were just created for us:

# app/models/task.rb
class Task
  include Mongoid::Document
  include Mongoid::Timestamps
  field :name, type: String
  field :complete, type: Mongoid::Boolean
  belongs_to :category # actually this line isn't from the generator, I just added it
end

And:

# app/models/category.rb
class Category
  include Mongoid::Document
  include Mongoid::Timestamps
  field :name, type: String
  has_many :tasks # same as the belongs_to above
end

First kind of interesting difference: instead of your models inheriting functionality from ActiveRecord via subclassing, our models now include functionality from the Mongoid::Document module. Among other things, this gives the class a field method. We use this to define the attributes that this model should have. Unlike ActiveRecord models, which know the attributes they can have by introspecting on their corresponding table in the database2, Mongoid models typically have a list right in the class definition of the name and type of its attributes. Later, when we call category.name = "Homework", Mongoid is dynamically figuring out what we mean based on our list of fields; it gives categories a name= and name method. This centralization appeals to me on an organizational level.

And an interesting similarity: has_many and belongs_to work pretty much exactly the same way. If you’re used to thinking relationally, you can use that here too.

So let’s try to create some data and see how that goes. Into the bin/rails console let’s go.

category = Category.new #=> #<Category _id: 52d1d2036d61633a9b000000, created_at: nil, updated_at: nil, name: nil>
category.name = "Homework" #=> "Homework"
category.save #=> true
category._id #=> BSON::ObjectId('52d1d29c6d61633b1b000000')
category.id #=> BSON::ObjectId('52d1d29c6d61633b1b000000')
category.tasks #=> []
category.tasks.class #=> Mongoid::Relations::Targets::Enumerable
category.tasks.build(name: "Study Mongoid") #=> #<Task _id: 52d1d62d6d61633c05000000, created_at: nil, updated_at: nil, name: "Study Mongoid", complete: nil, category_id: BSON::ObjectId('52d1d29c6d61633b1b000000')>
Task.count #=> 0
category.save #=> true
Task.count #=> 0
category.tasks.last.save #=> true
Task.count #=> 1
category.tasks.create(name: "Study Rails 4") #=> #<Task _id: 52d1d8596d61633cba040000, created_at: 2014-01-11 23:48:41 UTC, updated_at: 2014-01-11 23:48:41 UTC, name: "Study Rails 4", complete: nil, category_id: BSON::ObjectId('52d1d7696d61633cba010000')>
Task.count #=> 2
Task.all.class #=> Mongoid::Criteria

First of all: I guess I did have MongoDB installed and running on my system, who knew?

OK so functionally it’s almost exactly the same right? But there are some interesting differences:

  • the unique id attribute is now called _id instead of id (this comes from MongoDB, not Mongoid, though Mongoid helpfully aliases id to _id in case you forget) and is totally long and weird looking
  • that thing where queries are assembled and chainable and not invoked until the last moment is called a “Criteria” and not a “Relation”

These two Rails apps are available here: https://github.com/hardscrabble/comparing_mongoid_and_active_record

This is a really brief introduction to the basics of Mongoid. I want to dig in more. My laptop battery is at 6%. More to come.

  1. Confession: On my first attempt at this I skipped this flag and it created the application with ActiveRecord and I was trying to replace it and then I was like, hmm, maybe there’s a better way to do this. Unfortunately, there’s no rails new --database=mongodb like there’s a rails new --database=postgresql, among others 

  2. probably my favorite phrase I learned at Flatiron School was “introspecting on the database” 

New Year's Resolutions

January 6, 2014

Last year was good. I think I resolved to take programming seriously. I went to The Flatiron School and now I’m working at CipherHealth. I’ve learned a shit load and had a lot of fun.

Things I want to learn in 2014

  • Objective-C / iOS programming
  • Ember.js
  • Node.js
  • What the fuck a javascript promise is
  • How the hell source maps work
  • BASIC MUSIC PLAYING
  • How the health care industry works
  • VimScript

Things I want to make in 2014

Things I want to do in 2014

  • Move back to NYC
  • Write a god damn poem

Things I want to read (in 2014)

  • Less Twitter
  • Infinite Jest I guess?

sidenotes

December 27, 2013

EDIT April 2015: I took it off the site because it was kind of bad 🙂

background

There’s a hubbub1 going around about a fun plugin for popover footnotes called Bigfoot.

I think it’s cool. I definitely prefer that reading experience.

this new thing

Some people on Twitter said they prefer Grantland’s sidenotes, except for their behavior on mobile, where they basically don’t work. They imagined a solution that involves swiping/dragging, and enlisted me to work on it.

I’m not sure how to capture that kind of touch event and I’m curious to find out I guess.

I’m starting by recreating Grantland’s sidenotes, and then I’m going to go watch The Hobbit with my dad.

One thing that’s cool about the popular plugin is that it’s easy to drop in and use. What I’ve added to my site isn’t, because it makes assumptions about the structure of your HTML layout. I bet it could be abstracted in a way that’s broadly usable but I’m not sure how. Happy to take input on that!2

assumptions it makes

Here are the assumptions I’m currently making:

That your HTML layout looks something like this:

<div class="post">
  <div class="body">...</div>
  <div class="sidenotes"><ol></ol></div>
  <div class="clearfix"></div>
</div>

And your CSS (Sass here) looks something like this:

.post
  .body
    width: 70%
    float: left
  .sidenotes
    width: 25%
    float: left
  .clearfix
    clear: both

I’m also assuming that your footnotes look a lot like the ones generated by my favored markdown-to-html processor, kramdown, which … I have no idea if that’ll be a dealbreaker for interoperablity.

Here’s what the code looks like3:

$ ->
  # grab the sidenotes divs
  $sidenotes_container = $(".sidenotes")

  # grab the sidenotes list
  $sidenotes = $sidenotes_container.find "ol"

  # iterate over the footnotes at the bottom of the post
  # and work some magic on them
  $(".footnotes li").each (index, item) ->
    # wrap the footnote in a jQuery object
    $footnote = $(item)

    # move the footnote from the bottom to the right
    $footnote.remove().appendTo $sidenotes

    # remove the little arrow that links back to the source
    $footnote.find(".reversefootnote").remove()

    # find the source link from within the body of the post
    $source = $(".footnote").eq(index)

    # grab the previous sidenote, if there is one
    $previous_sidenote = $footnote.prev()
    $previous_sidenote = if $previous_sidenote.length then $previous_sidenote else undefined

    # let's set the vertical position of the current sidenote
    # if the previous one is kind of long, we need to push this one down
    # if not, it should be aligned with the source link
    $footnote.offset ->
      aligned_top = $source.offset().top
      if $previous_sidenote? and $previous_sidenote.offset().top + $previous_sidenote.height() >= aligned_top
        top: $previous_sidenote.offset().top + $previous_sidenote.height() + 5
      else
        top: aligned_top

gripes / todos

  • looks bad on mobile, and when resizing the windows. Should have some responsiveness, possibly including that swiping thing @smarterbits imagined
  • when you click a footnote link, nothing seems to happen. maybe the related sidenote should pulse briefly to attract the eye
  • I don’t like how posts without sidenotes kind of look unbalanced now. This makes me want to have at least one footnote per post? Weird.
  • vertical positions are screwed up when a post includes an embedded tweet, because the tweet’s height grows as Twitter’s JavaScript reformats the HTML from a vanilla blockquote to a whole thing, by which time my code has already set a height for all the sidenotes
  1. I noticed it linked by Dr. Drang, who praised it for being “webby”, and Marco Arment who praised it for being like Instapaper. 

  2. truthfully I’m eager to make some kind of open source thing that people use and collaboratively improve. 

  3. I’m archiving it and not linking to the source either here or on GitHub because it’s very liable to change and I want to archive its current state for reference or more likely nostalgia. Actually, I could link to the sidenotes.coffee file as it was at this specific commit, but I haven’t pushed it yet. I was planning to push the footnotes changes and this post, together, but now I want to push the changes first. OK I did. If you prefer GitHub’s syntax highlighting, the file is here. If you prefer the compiled JavaScript, it’s here. OK, now I can safely remove this sidenotes nonsense later on when I grow tired of it. 

iBooks for Mavericks

December 9, 2013

OS X 10.9 Mavericks brought us an awesome eBook reader for the desktop in iBooks. Since updating, I’ve gotten into the idea of keeping and managing a library of digital books on my computer, mostly in the open ePub format. I get these books from the excellent Project Gutenberg and publishers like Manning Publications (which has taken a bunch of my money recently due to its generous holiday sales).

I really love being able to keep and read books on my desktop. And it’s cool that they sync to iOS devices, pretty similarly to how iTunes syncs your music. This was possible before Mavericks, but it was all baked into iTunes, and it’s much better as a standalone app. I’d like to see Apple move further in this direction of breaking iTunes down into modules, maybe even introducing some kind of standalone syncing app so iTunes can really just be for managing and playing music, as it semantically desires to be.

Though it introduces the major, terrific feature of ePub rendering, iBooks unfortunately removed several features that its iTunes-embedded predecessor had, such as the ability to edit metadata and also, peevishly, the ability to right click and reveal the files on disk.

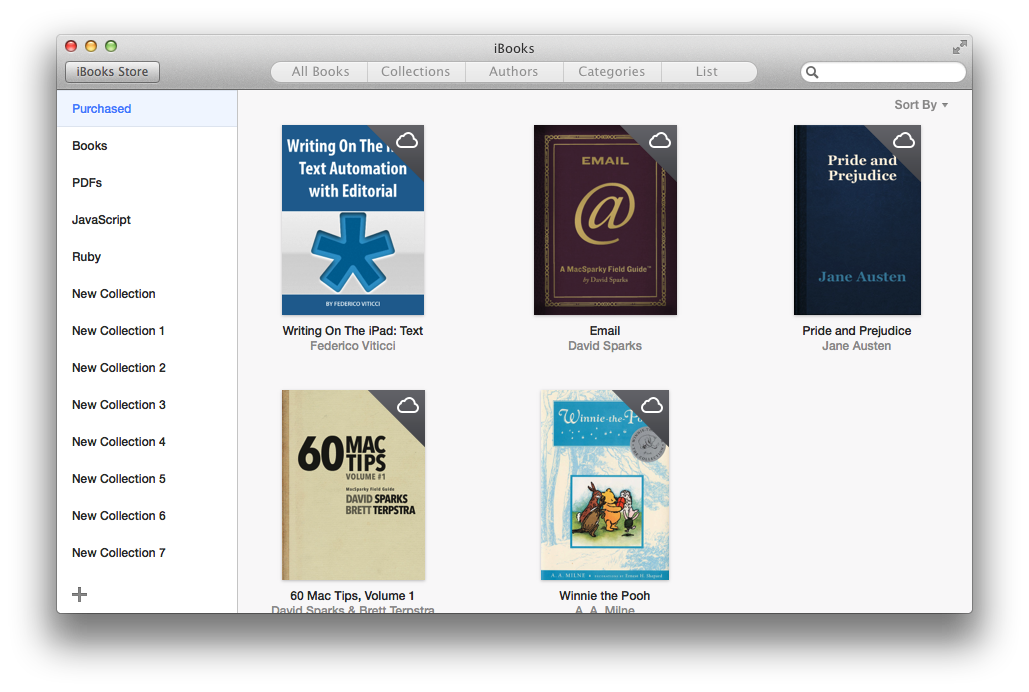
Another unfortunate negative to the app is it’s kind of terrible at organizing your books in any way except one flat list, sorted by most-recently-read or title. It offers these categories by default “Purchased”, which refers only to books purchased through Apple’s iBooks store and not the several books I purchased from other sellers, “Books” which refers to files in the ePub format exclusively with no regard to whether they even are books, and “PDFs” which refers to files in the PDF format even if they’re books.

There is some preliminary support for categorization in the ability to add files to “collections”, which removes them from their default category of “Books” or “PDFs”, as though they stop being those things.

A file can only be in one collection.

I think it’s impossible to delete collections, which is kind of too bad because I just clicked the lower-left “+” button 10 times.

My many iBooks collections

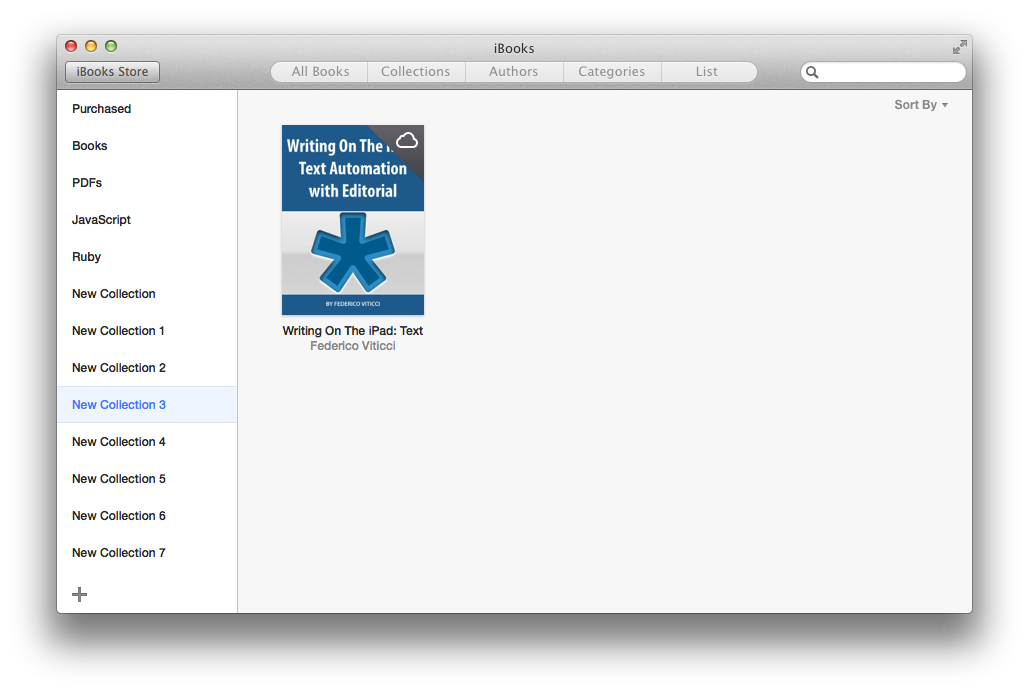
Once a book is in a collection, right clicking it gives you the option to “Delete” it, which actually doesn’t delete it, it returns it from the collection into either “Books” or “PDFs” (from where they can be removed from the app entirely). Books which you’ve purchased from the iBooks Store but haven’t downloaded don’t have the “Delete” option, but they do have the “Add to Collection” option, so I don’t think I can move this back out of my collections:

This books is forevermore collected

Actually it’s only true that you can (easily) remove books from “Books” and “PDFs” if they weren’t purchased from the iBooks store. Good luck deleting a book you bought from the iBooks store. It’s kind of possible but not really.

Moving a PDF and an ePub into the same collection seems to be the only way to get them to mix, which is the only reason I can think of to use collections. Unfortunately PDFs are second-class citizens because reading them kicks you over to Preview, which means you have to wait for Preview to open.

Right clicking a book also offers “Share”, an empty dropright menu.

Those filtering buttons along the top are permanently grey and unclickable for me?

Anyway I really like iBooks because I’m excited about reading ePubs on my Mac.